A Room After Sunset: Build a Layered Lighting Plan
A room can look balanced in daylight and become uncomfortable as soon as the sun disappears. One bright ceiling fixture often produces the wrong combination: too much light in the centre, too little where work happens, and hard shadows around the edges. Layered lighting solves this by giving different fixtures different responsibilities.
Begin after sunset with every lamp switched off. Daytime assumptions hide the real problem. The aim is not to make the room equally bright. It is to support movement, conversation, reading, and rest with controlled contrast.
List evening activities by location
Mark where people read, prepare a drink, use a laptop, find a book, walk between rooms, or watch a screen. Each activity needs light in a particular direction. Reading requires focused illumination over the page. Safe movement needs a gentle path. Conversation benefits from faces being visible without a lamp shining directly into anyone’s eyes.
Do not begin with fixture styles. Begin with these tasks and the surfaces that need to be seen.
Build a low ambient layer
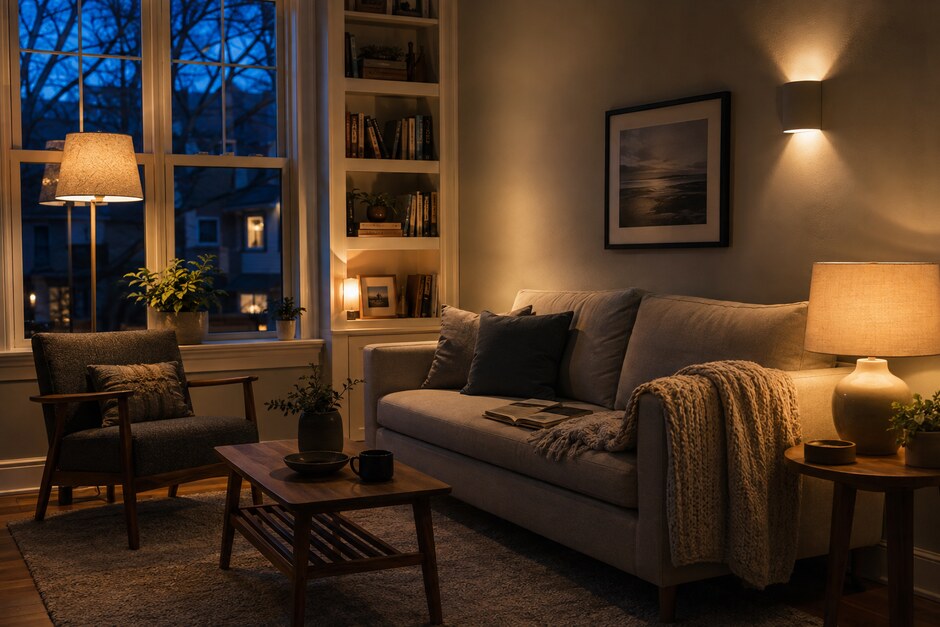
Ambient light establishes the room’s general level. It can come from a dimmed ceiling fixture, a shaded floor lamp, wall lights, or light reflected from a pale surface. In a small room, two modest sources at different positions often feel calmer than one powerful source overhead.
Allow some corners to remain quieter. Complete uniformity flattens depth and can make a domestic room feel like a workplace. The ambient layer should make movement easy without competing with every task lamp.
Place task light close to the task
A reading lamp should illuminate the page from the side and slightly behind the shoulder, not from across the room. A table used for puzzles or paperwork needs a broad pool of light that does not cast the user’s hand shadow across the work. A cabinet may need a small local source if its contents disappear at night.
Local light uses less brightness to achieve better visibility. Before adding a stronger bulb, move the fixture closer and adjust its direction.
Use accent light to reveal depth
Accent light is optional but useful. A small wall light, shelf lamp, or beam grazing a textured surface can establish a visual destination. It should reveal a material or edge rather than spotlight every decorative object.
One accent is often enough in a compact room. If every picture, shelf, and plant is highlighted, the eye has nowhere to rest.
Control glare and reflected brightness
Sit in every usual seat and look toward each fixture. A visible bare bulb, bright shade opening, or reflection in a television can make a low-light room tiring. Raise, lower, rotate, or shade the source until the light reaches the useful surface without entering the direct line of sight.
Glossy tables and framed glass can create secondary glare. Test them from real viewing positions rather than judging while standing beside the lamp.
Keep colour temperature coherent
Warm and neutral lamps can coexist, but abrupt differences are distracting when adjacent fixtures illuminate the same area. Choose a general temperature family for the room, then judge bulbs together at night. Printed package values help, but shades, wall colours, and dimming can change the result.
Colour rendering matters around food, fabrics, and skin tones. If colours look dull or distorted, the problem may be the light source rather than the room palette.
Plan the switches as part of the design
A beautiful lamp is rarely used if its switch is hidden behind furniture. Group the everyday evening lights so they can be activated on arrival and turned off without crossing a dark room. Smart controls can help, but a reachable physical switch remains valuable.
Test three scenes: arriving, active use, and winding down. Each scene should need only a small number of actions. A successful lighting plan is not the greatest number of fixtures. It is a room that becomes easier to use as the evening changes.